rfxsignals October 9, 2025 No Comments

Best Timeframes for Forex Scalping

Best Timeframes for Forex Scalping
Best Timeframes for Forex Scalping | YOUR_DOMAIN

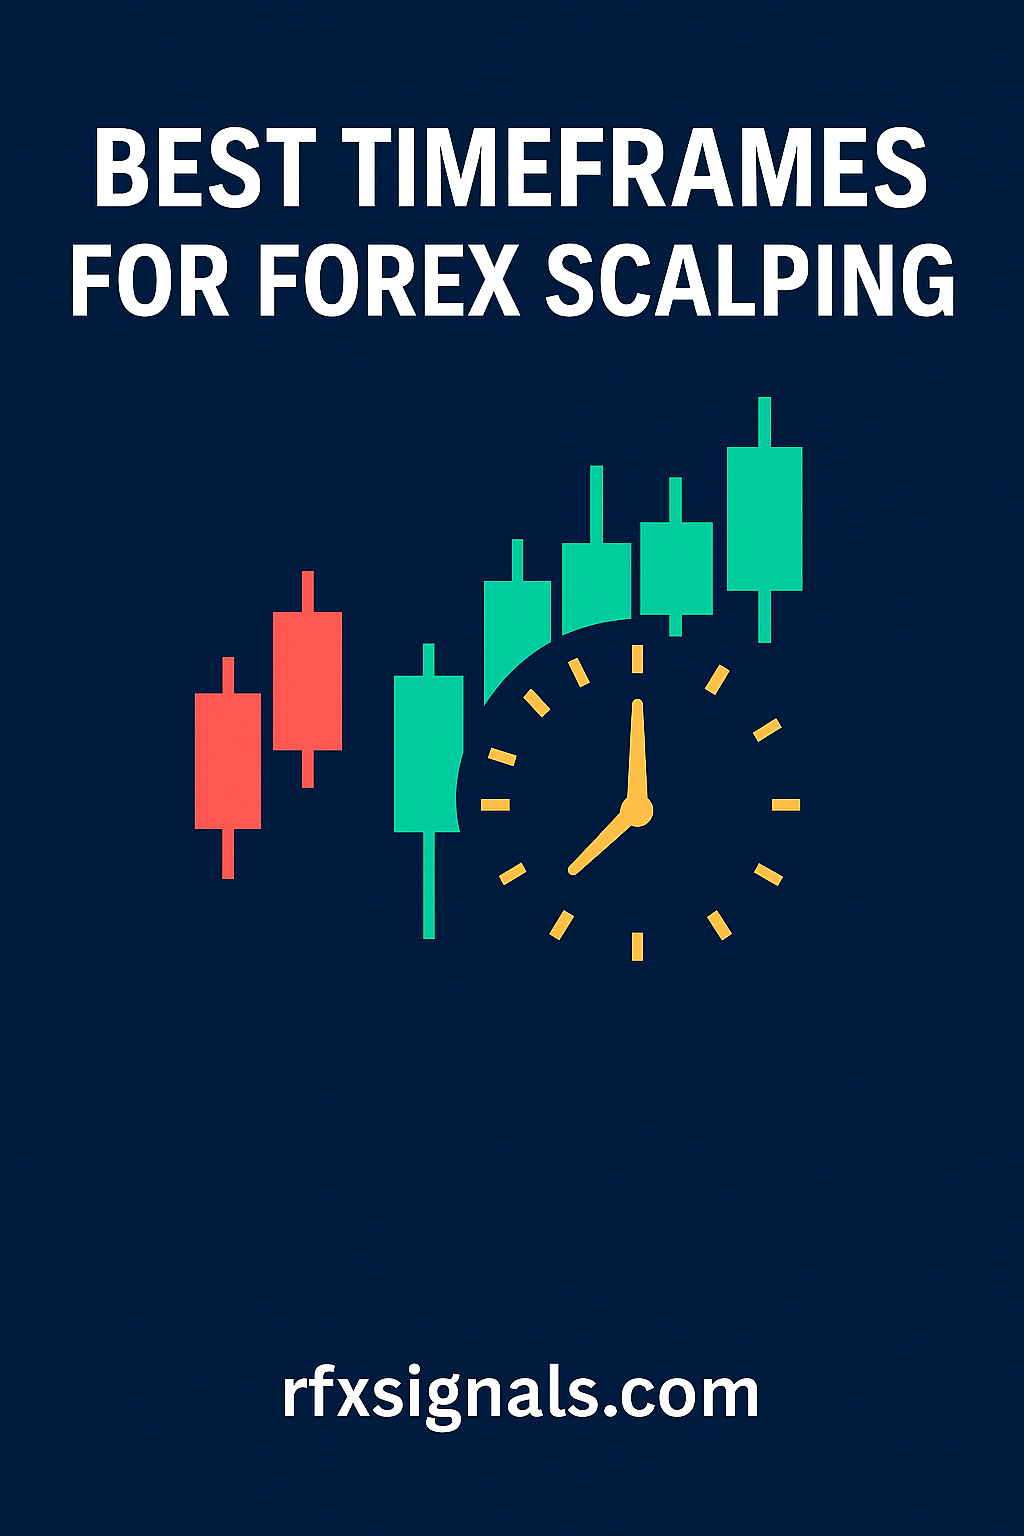
Best Timeframes for Forex Scalping — A Practical Guide

By Approx. 10–12 min read
Scalping relies on speed and precision. Choosing the right timeframe is critical — this guide helps you match timeframe, session, and strategy to optimize your scalping performance.

Scalping is a high-frequency intraday trading style that seeks to capture small price moves repeatedly throughout a session. Because scalpers trade quickly and frequently, timeframe selection directly affects signal quality, noise, risk management, and execution. This article explains the best timeframes for scalping, why they work, how market sessions influence them, and practical rules to implement on platforms like MT4/MT5.

Why timeframe matters for scalping

Timeframe choice determines the balance between noise and signal. Very low timeframes (ticks, 1s, 1m) show micro-movements and generate many signals — but many are false. Longer intraday charts (5m, 15m) reduce noise and allow clearer setups but produce fewer trades. Scalpers must choose the shortest timeframe that still provides a reliable edge, considering spread, slippage, and execution speed.

Common scalping timeframes and their trade-offs

1-minute (M1)

M1 is the fastest common scalping timeframe. It allows traders to capture micro-moves and enter multiple trades per session. Pros: many opportunities, tight targets. Cons: extreme noise, high false-signal rate, and high impact from spread and slippage. M1 is best for traders with ultra-fast execution, low spreads (ECN accounts), and systematic rules.

3-minute & 5-minute (M3, M5)

M3 and M5 are popular for a balance between activity and clarity. They offer fewer false signals than M1 while retaining frequent trade opportunities. Many profitable scalping systems are built on M5 because it smooths tick noise and still fits the scalper’s intraday rhythm.

15-minute (M15)

M15 is on the edge between scalping and intraday trading. It suits traders who prefer fewer trades per day but larger, more reliable moves. M15 scalping reduces the impact of spreads but requires slightly larger stops and more capital per trade.

Session selection — when to scalp

Scalping performance depends heavily on session volatility. The best windows are when two major sessions overlap — these are the moments liquidity and momentum spike.

  • London session (08:00–17:00 GMT) — high liquidity and many breakout opportunities.
  • New York session (13:00–22:00 GMT) — continues London momentum and offers strong moves during US news.
  • London–New York overlap (13:00–17:00 GMT) — the most active and popular time for scalpers.
  • Tokyo/London overlap — shorter and less busy; best for certain Asian pairs.

Matching timeframe to currency pairs

Choose pairs with tight spreads and ample liquidity for the chosen timeframe. For example:

  • EUR/USD, GBP/USD, USD/JPY — ideal for M1–M5 scalping due to low spreads and deep liquidity.
  • Minor pairs and exotics — often ill-suited for ultra-short timeframes because of wider spreads and erratic moves.

Strategy alignment — what your setup needs

Rule-based scalping strategies fall into two buckets:

  1. Momentum scalping — trades in the direction of short-term momentum (breakouts, ride the band). Works well on M1–M5 during high-volume sessions.
  2. Mean-reversion scalping — fade extreme micro-moves and scalp back to mean (Bollinger Band touches, orderflow imbalances). Often used on M5 and M15 with confirmation filters.
Align your timeframe with the type of signal your strategy generates. Momentum systems usually prefer shorter timeframes; mean-reversion benefits from slightly longer and smoother series to reduce false mean touches.

Risk, spreads and transaction costs

Smaller timeframes mean smaller nominal targets — so spreads and commission are a larger percentage of expected profit. To scalp profitably:

  • Use ECN accounts and tight-spread brokers.
  • Factor commissions into your expectancy calculations.
  • Keep position sizes sensible; microtargets require precise stop placement.

Execution and technology requirements

On M1–M5 timeframes, execution speed is critical. Use a low-latency broker, fast internet, and a reliable platform (MT4/MT5, or a direct market access platform). Consider a VPS near your broker’s server to reduce latency and slippage. Manual scalpers should practice precise order entry and learn hotkeys; automated systems can eliminate human reaction time.

Confirmation and higher-timeframe bias

Always align short timeframe scalps with higher timeframe bias (H1 or H4). For example, on an M5 scalp, ensure the 1-hour chart trend supports the direction of your trade. This reduces countertrend noise and increases probability of winning micro-moves.

Practical rules & checklist

Scalper's pre-trade checklist

  1. Is the session active? (London–NY overlap preferred)
  2. Is spread within acceptable limit for this pair/timeframe?
  3. Does the trade align with higher timeframe bias?
  4. Is position size set using risk % and distance to stop?
  5. Do I have an exit plan (fixed target, trail, or time-based exit)?

Backtesting and live testing

Backtest on tick or 1-minute data to capture execution realities. Forward-test on a demo or micro account before scaling up. Track key metrics: win rate, average R, maximum drawdown, and slippage. Scalping strategies are sensitive to market microstructure — historical tick data gives more realistic results than bar data alone.

Common mistakes scalpers make

Beware of these pitfalls:

  • Choosing a timeframe too short for your execution capability.
  • Ignoring spreads and commissions in expectancy calculations.
  • Trading illiquid pairs on low timeframes.
  • Lack of higher timeframe alignment leading to low-quality signals.

Recommended starting points

For beginners with decent execution and tight spreads:

  • Start with M5 on EUR/USD or USD/JPY during London–NY overlap.
  • Use clear filters (momentum indicator + price action) and target 5–10 pips per trade depending on pair.
  • Scale to M1 only if you can reliably execute and your broker offers minimal slippage.

Related reading

Conclusion

There is no single 'best' timeframe for scalping — it depends on your strategy, execution quality, chosen pairs, and session. M1–M5 offer high activity but require excellent execution and low costs; M15 and M5 serve scalpers looking for more reliability and larger micro-moves. Start with M5 during active sessions, align with higher-timeframe bias, factor in spreads and commissions, and rigorously backtest before trading live.


Disclaimer: Forex scalping involves high risk. Always use proper risk management and demo-test strategies before trading live.

rfxsignals October 9, 2025 No Comments

How to Use Bollinger Bands in MT4

How to Use Bollinger Bands in MT4
How to Use Bollinger Bands in MT4 | YOUR_DOMAIN

How to Use Bollinger Bands in MT4

By Approx. 9–12 min read
Master price volatility and trend with Bollinger Bands. This guide covers MT4 setup, settings, practical entries, exits, filters, and common mistakes — optimized for beginners and intermediate traders.

Bollinger Bands are one of the most popular volatility indicators used by forex traders. Invented by John Bollinger in the 1980s, they consist of a simple moving average (middle band) and two standard deviation bands (upper and lower). On MetaTrader 4 (MT4), Bollinger Bands are built-in and easy to apply. This article explains practical ways to use them for entries, exits, and risk management.

Understanding the components

The Bollinger Bands indicator includes three lines:

  • Middle band — typically a 20-period simple moving average (SMA)
  • Upper band — middle band + (k * standard deviation)
  • Lower band — middle band - (k * standard deviation)
The default k value is 2, which means the bands usually contain about 95% of price action in a normal distribution.

How to add Bollinger Bands in MT4

Open MT4, go to Insert > Indicators > Trend > Bollinger Bands. Use the default period 20 and deviation 2 to start. You can customize colors and line widths for clarity. Save the setup as a template so you can reuse it across charts.

Common settings and variations

While the default (20,2) is standard, traders tweak settings depending on timeframe and strategy:

  • Shorter period (10–15) — more responsive bands, more signals, but higher noise
  • Longer period (30–50) — smoother bands, fewer signals, better for longer-term trades
  • Deviation (1.5–2.5) — lower deviation tightens bands (more breakouts), higher deviation widens (fewer false breakouts)
Test settings in a demo/account before applying live.

Mean reversion vs breakout strategies

Bollinger Bands support two main approaches:

  1. Mean reversion — price tends to revert to the mean (middle band). Traders look to buy near the lower band and sell near the upper band, often combined with oscillators (RSI, Stochastic) to confirm oversold/overbought conditions.
  2. Breakout — strong trends often 'ride' the upper or lower band. A squeeze (narrow bands) followed by expansion often signals upcoming volatility. Traders enter on a breakout and use the middle band as a trailing stop or filter.

Practical entry rules (mean reversion)

Example rules for a mean reversion trade on H1/Daily:

  • Wait for price to touch or slightly pierce the lower band.
  • Confirm with RSI below 30 (or Stochastic in oversold region).
  • Enter a long when a bullish candle closes inside/beyond the band and momentum turns positive.
  • Place stop-loss a few pips below the recent low and target the middle band or upper band depending on reward-to-risk.

Practical entry rules (breakout)

Example breakout rules:

  • Identify a 'squeeze' — bands compressing for several periods.
  • Wait for price to close outside the band with increased volume or momentum confirmation.
  • Enter on the breakout candle close or on a retest to the band.
  • Use the middle band as initial trailing stop; target measured moves or ATR-based targets.

Using Bollinger Bands with other indicators

Bollinger Bands are stronger when combined with complementary indicators:

  • RSI/Stochastic — confirm overbought/oversold conditions for mean reversion.
  • ADX — gauge trend strength; avoid mean reversion when ADX shows a strong trend.
  • Volume — breakout with rising volume is more reliable (volume indicators in MT4 or tick volume).
  • ATR — use ATR to set stops and targets aligned with volatility.

Stops, position sizing & risk management

Never trade without defined stops. For mean reversion, stops should be tight (below swing low/high) because trades are countertrend. For breakouts, use wider stops since volatility may spike. Position size should be calculated using risk % per trade (e.g., 0.5–1% of account equity) and distance to stop-loss — use an MT4 position size calculator or spreadsheet.

Templates, alerts and automating on MT4

Save your Bollinger Bands setup as a chart template (Charts > Template > Save Template). Use MT4 alerts to notify when price crosses band levels (Alerts tab in Terminal) or add an indicator that pops up alerts. If you prefer automation, you can code a simple Expert Advisor (EA) that executes your confirmed Bollinger strategy — but always backtest thoroughly.

Common mistakes and how to avoid them

Avoid these pitfalls:

  • Using bands alone: Bollinger Bands are not a magic indicator. Combine with momentum and volume filters.
  • Forcing trades: Just because price touches a band doesn’t guarantee reversal — wait for confirmation.
  • Ignoring timeframe alignment: Use higher timeframe bias to filter lower timeframe entries.
  • Overfitting settings: Don’t optimize parameters to past data without forward-testing.

Backtesting and journaling

Backtest your Bollinger approach on historical data and log each trade in your journal. Track entry reason, stop, target, outcome, and notes. Measure win rate, average R, and expectancy. This objective approach separates lucky runs from a robust edge.

Example trade — step-by-step

Suppose EUR/USD H4 with BB(20,2): price squeezes for 8 bars, ATR falls, then a bullish candle closes above upper band with rising tick volume. Confirmation RSI crosses above 50. Entry: next candle open; stop: below breakout candle; target: 1.5–2x risk or middle band retest. Trail stop under middle band as price advances.

Quick tips

  • Default BB(20,2) is a good starting point.
  • Squeezes often precede volatility — be ready but patient.
  • Use higher timeframe bias to avoid false breakouts.

Related reading

Conclusion

Bollinger Bands are versatile — useful for both mean reversion and breakout strategies. On MT4 they’re easy to set up and customize. The key to success is clear rules, confirmation from complementary indicators, disciplined risk management, and thorough backtesting.


Disclaimer: Trading involves risk. This article is educational and not financial advice.

rfxsignals October 9, 2025 No Comments

Forex Trading Psychology: Tips for Beginners

Forex Trading Psychology: Tips for Beginners
Forex Trading Psychology: Tips for Beginners | YOUR_DOMAIN

Forex Trading Psychology: Tips for Beginners

By 8 min read
Start with mindset. Successful forex trading is 80% psychology and 20% strategy. This guide gives beginner-friendly, actionable tips to manage emotions, control risk, and build a consistent trading routine.

Forex trading attracts beginners with the promise of fast returns, 24/5 markets and easy access. But beyond charts and indicators, the most decisive factor for long-term success is psychology — discipline, patience, and emotional control. In this article you’ll learn simple, repeatable habits that protect your capital and help you trade with confidence.

1. Understand why psychology matters

Markets don’t care about your feelings. They only respond to supply and demand. However, traders are human: fear causes missed opportunities and greed fuels reckless risking. Understanding the role of the mind turns those emotional reactions into manageable inputs instead of destructive forces.

2. Start with a trading plan — and follow it

A trading plan is your instruction manual. It defines:

  • Markets & timeframes you trade
  • Entry and exit rules
  • Risk per trade (e.g., 0.5–2% of account equity)
  • Maximum daily/weekly drawdown thresholds
Consistently following a written plan reduces emotional decision-making and makes performance measurable.

3. Use risk management as your first defense

Proper risk management is the mechanical removal of emotion. Limiting risk per trade to a small, predetermined percent of your account ensures you can survive losing streaks and keep trading. Use stop-losses and position sizing calculators to enforce this rule. Remember: preserving capital is more important than pursuing large wins.

4. Control emotions with simple rules

Two common traps are revenge trading and overtrading. Revenge trading is trying to recover losses quickly — usually leading to bigger losses. Overtrading often happens when traders chase setups without waiting for confirmed signals. Use simple behavioral rules such as:

  • Stop trading after 3 losing trades in a row for the day.
  • Take breaks when feeling stressed, tired, or distracted.
These rules protect both capital and mental clarity.

5. Keep a trade journal — and be brutally honest

A trade journal is both a record and a feedback loop. Record entries include date/time, pair, timeframe, entry/exit, stop-loss, take-profit, outcome, and a short note on why you entered. Every week, review your journal and look for patterns: are you letting winners run? Are you cutting winners too early? Are you frequently entering around news when volatility spikes? The journal turns emotion into data that can be improved.

6. Build routines that support discipline

Successful traders rely on consistent routines. Create a pre-market checklist: check economic calendar events, confirm open positions, confirm risk use, and note high-level bias. After-market routines include reviewing trades and logging outcomes. Rituals make discipline automatic and reduce the need for willpower in the heat of the trade.

7. Learn to accept uncertainty

No trade is certain. Lose the illusion of control and focus on probabilities. If your edge wins 55% of the time with a favorable risk-reward, that edge will produce profits over many trades. Obsessing over single outcomes increases stress and leads to poor choices.

8. Practice with small size and scale up

Start trading live with very small sizes or use a demo account for pattern recognition and platform familiarity. As your journal proves consistency and your psychological responses stabilize, scale position size slowly. Increasing size too quickly invites strong emotional reactions that break rules.

9. Use automation where appropriate

Automation — alerts, limit orders, or algorithmic entries — removes emotional latency. If you consistently struggle to place an order at a planned price, automation ensures the execution matches your plan. Many traders combine manual analysis with automated execution for best results.

10. Manage stress outside trading

Healthy sleep, exercise, and nutrition improve decision-making. Trading performance is often a lagging indicator of lifestyle quality. If you’re chronically tired or stressed, your judgment will decline. Prioritize well-being like you would risk management.

11. Avoid information overload

Beginner traders often chase every indicator, system, or signal. This creates confusion and inconsistent decision-making. Limit yourself to one or two timeframes and a couple of indicators that complement your price-action understanding. Less noise equals clearer choices.

12. Create measurable performance metrics

Set objective metrics: monthly return target, max drawdown, win rate, average R (reward-to-risk) per trade. Measure these consistently. If a metric drifts outside acceptable bounds, stop trading and analyze. Clear metrics remove subjective judgments and prompt data-driven adjustments.

13. Learn from experienced traders — but adapt

Seek mentors, public trade critiques, or community feedback, but avoid mindlessly copying others. Each trader has a unique temperament and capital base. Learn principles, then adapt them into a plan that suits your personality and schedule.

14. Recovering from losses: practical steps

Losses are inevitable. When you encounter a drawdown, reduce position sizes and return to fundamentals: check your journal, re-run your edge proof (backtesting), and if necessary, take a short break. Trying to 'win back' losses quickly is a psychological trap that usually worsens the situation.

15. Final checklist before you trade

  1. Do you have a plan for this trade? (entry, stop, target)
  2. Is your position size within risk limits?
  3. Are there major news events that could affect this pair?
  4. Do you feel emotionally stable right now to execute the trade?

Quick tip

If you feel impulse to change the plan mid-trade, step away and wait 30 minutes. Most impulsive decisions fade when given time.

Related reading

Conclusion

Forex trading psychology is a practice, not an innate trait. By building a written plan, limiting risk, keeping a disciplined routine, and journaling trades, beginners can reduce emotional mistakes and increase the probability of long-term success. The market will always be noisy — your job is to manage what’s inside your control: your plan, your risk, and your reactions.


Disclosure: Trading forex involves risk. Past performance is not indicative of future results. Always trade within your risk tolerance.

rfxsignals October 7, 2025 No Comments

What Is Leverage in Forex? Explained Simply

What Is Leverage in Forex? Explained Simply

What Is Leverage in Forex? — Explained Simply

Reading time: ~9–11 mins • Updated:

Leverage is a core feature of forex trading: it lets you control a large position with a relatively small amount of capital. That sounds great — and it can be — but leverage also magnifies losses. This guide explains what leverage and margin are, gives clear examples, and gives practical, safe rules that Indian traders can use to manage leverage responsibly.

Chat on WhatsApp Join our Telegram
Need a leverage checklist?
Downloads

What is leverage? The simple definition

Leverage lets you open positions larger than your account balance by borrowing a portion from the broker. It's expressed as a ratio — for example, 50:1 means you can control $50,000 of currency with $1,000 of your own money. Another way to say it: leverage = Position Size / Margin.

What is margin? How margin and leverage relate

Margin is the amount of money the broker requires you to deposit to open and maintain a leveraged position. Using 50:1 leverage, a $100,000 position requires $2,000 margin (100,000 / 50 = 2,000). If the market moves against you, margin requirements may increase and you could face a margin call or automatic closeout.

Clear examples — see how leverage works

Example 1 — low leverage

Account balance: ₹100,000. Leverage 10:1. You open a position worth ₹500,000 (0.5 lot equivalent). Margin required = 500,000 / 10 = ₹50,000. If the market moves 1% against you, loss = ₹5,000 (1% of ₹500,000) which is 5% of account.

Example 2 — high leverage

Same account: ₹100,000. Leverage 100:1. You open a position worth ₹1,000,000. Margin required = 1,000,000 / 100 = ₹10,000. A 1% adverse move causes a ₹10,000 loss — 10% of the account. Higher leverage magnifies both gains and losses.

Benefits of leverage (why traders use it)

  • Amplified returns: small capital can produce meaningful profits when the market moves in your favor.
  • Capital efficiency: allows diversification — you can allocate capital across multiple ideas without fully funding large positions.
  • Smaller initial capital needed: traders can access global FX markets with modest investment.

Risks of leverage (why it can be dangerous)

  • Magnified losses: losses scale with position size — a small adverse move can quickly wipe capital.
  • Margin calls & stop-outs: if equity falls below maintenance margin, the broker may close positions automatically.
  • Emotional stress & overtrading: higher leverage often leads to larger position sizes and poor risk decisions.

How brokers set maximum leverage

Brokers set maximum leverage based on regulation, internal risk policy, and instrument. In many regulated markets leverage limits have been reduced (for retail clients) to protect traders. In India, many brokers offer different leverage for INR pairs vs majors — always check contract specs.

How to choose the right leverage for you — practical rules

There’s no one-size-fits-all, but these rules keep you safe:

  • Rule 1 — Risk per trade: decide a fixed % of account to risk per trade (e.g., 0.25–1%). Use leverage to size positions so dollar risk equals that percentage.
  • Rule 2 — Use lower leverage for intraday/high-frequency trading: even intraday traders benefit from moderate leverage because frequent small losses add up.
  • Rule 3 — Stress test scenarios: simulate large moves (1–3%) to see if your account survives multiple adverse moves.
  • Rule 4 — Avoid using maximum available leverage: just because a broker offers 500:1 doesn’t mean you should use it.

Position sizing — the practical bridge between leverage & risk

Position sizing translates risk into lot size. Steps:

  1. Choose risk % of account (e.g., 0.5%).
  2. Decide stop-loss distance in pips and calculate pip value for your lot size.
  3. Compute lot size so that stop-loss × pip value × lots = chosen risk amount.

This method ensures you control absolute money risk regardless of leverage ratio.

Margin calls and stop-outs — what to expect

Brokers publish maintenance margin and stop-out levels. If your equity falls to the maintenance margin, you get a margin call or automatic position closures. To avoid this, keep sensible leverage, maintain spare margin, and do not risk excessive % of account on a single trade.

Leverage & overnight funding (swaps) — an extra cost

Leveraged positions often incur overnight financing (swap) if held across rollover. Higher leverage increases position size and therefore financing costs. Consider swap rates when holding leveraged positions overnight or longer.

Practical checklist — safe leverage use

  1. Decide your maximum account leverage (e.g., 10:1 or 25:1) based on your risk tolerance.
  2. Use % risk per trade (0.25–1%) and compute position size from stop-loss, not from leverage.
  3. Keep margin cushion — avoid trading to the full available margin.
  4. Account for swap costs and possible slippage during volatile events.
  5. Backtest and demo trade your strategy with the chosen leverage setting.

Leverage examples specific to INR traders

Indian traders should check whether their broker offers onshore INR pairs or offshore CFDs — leverage, margin, and tax/treatment can differ. For USD/INR pairs, brokers sometimes set different margin rules; always confirm with contract specs and support.

Common leverage mistakes & how to avoid them

  • Using max leverage for every trade: scale leverage to trade objective and volatility.
  • Poor stop placement: too tight stops with high leverage lead to frequent blow-ups — use ATR-based stops.
  • No contingency capital: maintain emergency margin to survive adverse runs.

SEO-friendly internal & external links to add

Add internal links to build topical authority and link out to reputable resources:

Final takeaway — leverage is a tool, not a shortcut

Leverage enables efficient capital use but greatly increases risk. The right approach is to decide risk first (fixed %), calculate position size using stop-loss, and only then let leverage be the mechanical enabler. Use demo testing, maintain margin cushions, and avoid the temptation to chase bigger profits by simply dialing up leverage.

#Forex#Leverage#RiskManagement#Trading
rfxsignals October 7, 2025 No Comments

Best Forex Apps for Indian Traders

Best Forex Apps for Indian Traders

Best Forex Apps for Indian Traders — Top Picks & How to Choose

Updated: • Reading time: ~8–10 mins

Choosing the right forex app is about more than looks — execution quality, spread transparency, INR support, order types and regulatory safety matter most for Indian traders. Below we compare the best mobile and desktop apps, explain what to look for, and recommend apps by trader profile (beginner, intraday scalper, swing trader, and position trader).

Quick summary — top picks

  • Best for beginners: App A — simple UI, educational resources, demo account.
  • Best for execution & scalpers: App B — low spreads, fast execution, VPS support.
  • Best for INR traders: App C — direct USD/INR pricing, INR deposits/withdrawals.
  • Best all-rounder: App D — multi-asset, strong charting, reliable mobile + desktop.

What Indian traders must check before choosing an app

A few India-specific items make a big difference:

  • Regulation and safety: Is the broker/regulatory entity transparent? Prefer regulated brokers and read their disclosures.
  • INR support: Can you deposit/withdraw in INR easily? Does the app offer USD/INR as a native instrument or synthetic?
  • Execution & spreads: Low spreads and fast fills are essential for scalpers. Check live spreads and execution reports where available.
  • Order types & margin rules: Does the app support limit, stop-entry, OCO, guaranteed stop (if needed) and proper margin display?
  • Customer support hours: India session support is valuable — check local support availability.
  • Tax & reporting: Some apps provide P&L reports and exportable statements useful for Indian tax filings.

Top forex apps — comparison table (features at a glance)

AppPlatformINR SupportBest forNotes
App AiOS / Android / WebNoBeginnersSimple UI, strong tutorials, demo mode
App BiOS / Android / DesktopLimitedScalpersLow spreads, ECN routing, VPS support
App CAndroid / WebYesINR tradersDirect INR funding and USD/INR
App DiOS / Android / DesktopNoAll-roundAdvanced charts, multi-asset

Detailed app picks & why they matter

App A — Best for beginners

App A focuses on UX and education. It includes a step-by-step onboarding, in-app tutorials, and a generous demo environment. While spreads may be wider than ECN apps, it’s ideal for new traders who need to learn order types and risk management before trading live.

App B — Best for execution / scalpers

App B offers ECN/STP routing, very low latency, and supports VPS placement. Intraday scalpers benefit from tight spreads and fast fills. Check minimum lot and commission structure — often low spreads come with per-lot commissions.

App C — Best for INR-native traders

App C supports INR deposits and direct USD/INR instruments (or onshore derivatives), making it easy to hedge rupee exposure and avoid FX conversion hassles. Watch margin rules and fine print about RBI-related restrictions.

App D — Best all-rounder for charts & multi-asset

App D provides professional charting, indicator sets, backtesting modules and both mobile and desktop parity. It’s good for swing and position traders who want a single app for forex, equities and commodities.

How to choose the right app for your trading style

Match the app’s strengths to your needs:

  • Scalper: prioritize spreads & execution (App B)
  • Swing trader: prefer charting & multi-timeframe tools (App D)
  • Beginner: choose education & demo support (App A)
  • INR hedger: pick apps with native INR flows (App C)

Security, KYC & compliance — don’t skip this

Ensure the app uses strong encryption, two-factor authentication, and clear KYC/AML requirements. If the app is offered by a broker outside India, check whether they accept Indian clients and how transfers (INR ↔ USD) are handled.

Cost considerations — beyond spreads

Don’t just look at spreads. Consider commissions, overnight financing (swap), deposit/withdrawal fees, and currency conversion costs. For INR funding, conversion margins can add hidden costs.

Practical checklist before installing & funding an app

  1. Read the broker’s T&Cs and regulatory status.
  2. Open a demo and test execution during Indian session times.
  3. Check live spreads on the pair(s) you trade (USD/INR, EUR/USD, etc.).
  4. Verify deposit/withdrawal process and any INR conversion fees.
  5. Test customer support responsiveness during India hours.

SEO-friendly internal & external link plan

Link this page to related content on your site to build topical authority:

Final takeaway — pick, test, and audit

The “best” forex app depends on your priorities: execution, INR support, charts, or education. Always demo-test an app for at least 2–4 weeks during the specific hours you’ll trade, keep a small first deposit, and audit fills and statements. Use internal linking to related reviews on your site to retain visitors and improve SEO.

#ForexApps#USDINR#Trading#India
rfxsignals October 7, 2025 No Comments

How to Use Moving Averages for Trend Trading

How to Use Moving Averages for Trend Trading

How to Use Moving Averages for Trend Trading — Practical Guide & Rules

Reading time: ~9–11 mins • Updated:

Moving averages (MAs) are among the simplest and most powerful tools for identifying trends, smoothing noise, and defining entries/exits. This guide covers which MAs to use, how to choose periods and timeframes, crossover systems, confirmation techniques, risk management, and ready-to-use recipes for Forex, stocks and crypto traders.

Quick summary — key takeaways

  • Use Simple MA (SMA) to observe long-term direction and Exponential MA (EMA) for responsive signals.
  • Common period setups: 20/50/200 for trend structure; 9/21 for shorter, nimble entries.
  • Combine MAs with price action and higher-timeframe confirmation to reduce false signals.
  • Always size risk per trade and prefer trades that align with the higher-timeframe trend.

What a moving average does (simple explanation)

A moving average smooths price by averaging recent data points. It reduces noise so you can see the underlying trend direction. There are two common types:

  • Simple Moving Average (SMA) — arithmetic mean of prices over N periods. Smooth but laggy.
  • Exponential Moving Average (EMA) — gives more weight to recent prices, so it reacts faster to changes.

Which MA should you pick? (rules of thumb)

Choice depends on your time frame and style:

  • Scalpers / Intraday: 8–21 EMA for quick signals (1–15m charts).
  • Swing traders: 20 MA and 50 MA on 1H/4H charts for better noise control.
  • Position traders: 100 / 200 SMA to define long-term trend (daily/weekly).

Start with classic sets (9/21/50/200) and tune to the instrument’s volatility.

Three practical MA-based trend setups

1) Trend filter + pullback entry (recommended)

Use a higher-timeframe MA as trend filter (e.g., daily 200 SMA). On your trade timeframe (4H/1H) wait for price to pull back to a shorter MA (20 SMA/EMA) and show a rejection (pin bar, bullish engulfing). Enter in direction of the higher-timeframe trend. This reduces mean-reversion losses and increases probability.

2) Two-MA crossover (simple system)

Entry: when the fast MA (e.g., 9 EMA) crosses above the slow MA (e.g., 21 EMA) — buy. Exit: when it crosses back below. Use higher-timeframe trend alignment and volume/ATR filter to avoid whipsaws. Always combine crossovers with a stop based on recent volatility.

3) MA Ribbon / Multi-MA confluence

A cluster of aligned MAs (e.g., 8/13/21/34 EMA) forming a ribbon indicates strong trend momentum. Look for pullbacks to the ribbon’s upper or lower edge for entries; the tighter the ribbon, the stronger the trend often is.

Entry, stop and target rules

A repeatable plan is essential. Example rule-set:

  • Entry: Price closes above fast MA and above a confirmation candle (e.g., bullish engulfing) on 1H chart.
  • Stop Loss (SL): below recent swing low or a multiple of ATR(14) (e.g., 1.5×ATR).
  • Take Profit (TP): fixed R:R 1:2 or structure-based (next resistance / Fibonacci extension).
  • Position sizing: calculate LOT so that SL risk = chosen % of account.

Reduce false signals — confirmation checklist

Moving averages give many signals; filter them:

  • Confirm with higher-timeframe trend (only take trades in the same direction).
  • Check volume or tick activity — good confirmation for breakouts.
  • Use ATR to avoid taking signals in extremely low volatility environments.
  • Avoid trading across major news events unless you have a tested plan.

Multi-timeframe approach (MTF)

Use a two-frame check: higher timeframe (e.g., daily) defines the bias; lower timeframe (e.g., 1H) times entries. Example: Daily 200 SMA is up → only take buys on 1H when price pulls back to 20 EMA and shows bullish price action.

Examples & visual rules (how to practice)

Backtest visually on 50–100 charts: mark MA crosses, filter by market structure, record SL/TP and outcome. Use demo accounts to forward test the exact MA periods you intend to use. Track win rate, average R:R and expectancy.

Common pitfalls and how to avoid them

  • Whipsaw losses: avoid small-period crossovers on choppy markets; prefer higher-timeframe alignment.
  • Overfitting: don’t optimize MA periods excessively on historical data — keep rules robust and simple.
  • Ignoring volatility: fixed pip stops without ATR consideration lead to premature exits.

Combining MAs with other tools

Best results come from combining MAs with non-redundant indicators: price action, support/resistance, Fibonacci levels, and volume. An MA tells you direction; price action tells you context.

Sample strategy (ready-to-test)

Strategy: 21 EMA (fast), 50 SMA (trend), ATR(14) for stops.

  1. Bias: 50 SMA slope positive and price above 50 SMA → bullish bias.
  2. Entry: 21 EMA crosses above short pullback and a confirmation candle closes above 21 EMA on 1H.
  3. SL: 1.5×ATR below entry.
  4. TP: 2× risk or next swing resistance; trail with 21 EMA after price moves 1×ATR in your favor.

Broker & execution tips

Use brokers with reliable execution and low spread on your chosen instrument. For intraday MA trading, lower spreads and low latency matter. Always confirm that your platform's MAs match your backtest (some platforms use different price sources — close vs typical).

SEO-friendly internal & external linking strategy

Link this article to related pages and a few trusted external references:

Final checklist before you trade

  1. Confirm higher-timeframe trend (200 SMA or 50 SMA).
  2. Validate entry with price action and ATR-based stop.
  3. Size position so SL risk = chosen % of account.
  4. Backtest and forward-test on demo for at least 3 months before scaling live.
#Trading#MovingAverages#TrendTrading#Forex
rfxsignals October 7, 2025 No Comments

Tamil Guide: What Is a Pip in Forex?

Tamil Guide: What Is a Pip in Forex?

பிப் (Pip) என்றால் என்ன? — தமிழ் வழிகாட்டி

படித்துக்கொள்ள நேரம்: ~8–10 நிமிடம் • Updated:

ஃபோரெக்ஸ் வர்த்தகத்தில் "பிப்" என்பது சிறந்த அடிப்படை அளவுகோல். இது ஒரு நாணய ஜோடியின் விலை மாற்றத்தின் மிகச் சிறிய அலகாக செயல்படுகிறது. இந்த கட்டுரையில் நாம் பிப் என்ன, அதன் மதிப்பு எப்படி கணக்கிடுவது, பல உதாரணங்கள், மற்றும் வர்த்தகத்தில் இதைப் பயன்படுத்துவதற்கான நடைமுறை டிப்ஸ் அனைத்தையும் தமிழ் Language-ல் தெளிவாக பார்க்கப் போகிறோம்.

WhatsApp-ல் மாற்று Telegram சேரவும்
மேலும் முழுமையான கையேடு வேண்டும்?
தொடர்பு கொள்ளுங்கள்

பிப் என்ற சொல்லின் அடிப்படை விளக்கம்

"Pip" என்பதன் முழுப் பெயர் "Percentage in Point" அல்லது "Price Interest Point" என்று சிலர் வர்ணிக்கிறார்கள் — ஆகையால் அது விலையில் ஏற்படும் மிகச் சிறிய மாறுதலை குறிக்கிறது. பெரும்பாலான நாணய ஜோடிகளில் பிப் என்பது நான்காம் தசம இடம் (0.0001) ஆகும். உதாரணமாக EUR/USD 1.1050 → 1.1051 ஆக உயரின் போது அது 1 பிப் உயர்வு ஆகும்.

எதிர்பாராத விதங்களில் வேறுபாடுகள் (JPY போன்ற ஜோடிகள்)

சில ஜோடிகள், குறிப்பாக ஜப்பான் யென் (JPY) அடிப்படையிலான ஜோடிகள், இரண்டு தசம இடங்களில் (0.01) பிப் அளவாகக் குறிப்பிடப்படுகின்றன. உதாரணம்: USD/JPY 110.25 → 110.26 => இது 1 பிப் ஆகும்.

பிப் மதிப்பு (Pip Value) எப்படி கணக்கிடுவர்?

பிப் மதிப்பு என்பது ஒரு பிப் மாற்றம் உங்கள் கணக்குக்கான நாணய மதிப்பில் எவ்வளவு பணம் என்று குறிப்பிடும். இது உங்கள் லாட் சைஸ் மற்றும் ஜோடிக்கு ஏற்ப மாறும். அடிப்படை சூத்திரம் — சராசரி எண்ணிக்கையாக:

Pip Value = (0.0001 / Current Exchange Rate) × Lot Size × Contract Size

பொதுவாக стандарт lot = 100,000 base units. மிக எளிதான உதாரணம் கீழே:

உதாரணம் 1 — EUR/USD

நீங்கள் 1 standard lot (100,000 EUR) வெளியாக EUR/USD 1.1000 இல் கொண்டிருந்தீர்கள். 1 பிப் (0.0001) மாற்றம் = 0.0001 × 100,000 = 10 USD. அதாவது ஒவ்வொரு பிப் மாற்றத்திற்கும் $10 ஆகும்.

உதாரணம் 2 — USD/INR (INR கணக்கில்)

இந்திய டிரேடருக்கு உதவியாக, USD/INR போல ஒரு ஜோடியில் பிப் மதிப்பு ரூபாயில் எப்படி இருக்கும் என்பதை தெரிந்து கொள்வோம். فرضித்தல்: USD/INR = 83.5000. ஒரு இலவச standard lot = 100,000 USD என்று எடுத்தால், 1 பிப் (0.01 அல்லது 0.0001? ) — INR ஜோடிகளின் decimals broker ஒவ்வொரு முறையும் வேறுபடலாம்; பொதுவாக USD/INR இல் 0.0001 என்பது 0.0001 × 100,000 = 10 USD ≈ 835 INR (உதாரணம் மட்டும்). ஆனால் நீங்கள் சிறிது கவனமாக, broker தரவின் அடிப்படையில் pip definition-ஐ சரிபார்க்கவேண்டும்.

லைவ் கணக்கீட்டு டிப்ஸ் — உங்கள் கணக்கிற்காக மதிப்பு (Practical)

  • உங்கள் broker-ன் contract specifications (pip definition & contract size) ஐ சரிபார்க்கவும்.
  • நீங்கள் micro lot (0.01) அல்லது mini lot (0.1) பயன்படுத்தினால் பிப் மதிப்பு இவை proportionally குறையும்.
  • உங்கள் கணணியில் பிப் மதிப்பை தானாகக் கணக்கிடும் சிறிய calculator (spreadsheet அல்லது ஆப்லைன் tool) வைத்துக்கொள்ளுங்கள்.

பிப்-அனைத்து பயன்படுத்துவதன் பயன் — நிதி நிர்வாகம், லைவ் ஆப்டர்

பிப் அமைப்பை புரிந்துகொள்வது position sizing, stop-loss மற்றும் take-profit அமைப்பிற்கு அவசியம். நீங்கள் எவ்வளவு ரிஸ்க் (உதாரணம்: 1% account) எடுத்தால், அந்த ரிஸ்கை பிப்-ஆக எப்படி மாற்றுவது என்பது முக்கியம் — அதை வைத்து lot size தீர்மானிக்கலாம்.

வணிக உதாரணம் — SL மற்றும் TP அமைப்பு

நீங்கள் EUR/USD இல் 50 பிப் Stop Loss யுடன் position எடுத்தீர்கள் என்று வைத்துக்கொள்ளலாம். ஒவ்வொரு பிப் மதிப்பும் $1 ஆக இருந்தால் (micro lot பொதுவாக), மொத்த ரிஸ்க் = $50. இதை உங்கள் risk-percentage விதியுடன் ஒப்பிட்டு lot தேர்வு செய்யவும்.

பிப்ஸ், பிப்ஸ்கள் மற்றும் பிபெட்டுகள் (Pips, Pips & Pipettes)

சில பிளாட்ஃபாரங்கள் pip இன் fractional பகுதியாக pipette (1/10 of a pip) ஐ காட்டுகின்றன. உதாரணம்: EUR/USD 1.10503 — இங்கு 3 означает pipettes. இது சிறு ஸ்கால்பிங் போன்ற போது நுணுக்கமான execution க்கு பயனுள்ளதாக இருக்கும்.

FAQ — சாதாரண கேள்விகள்

1. எல்லா ஜோடிக்கும்தான் பிப் மாற்றமா ஒரே மாதிரி இருக்கும்?

இல்லை. JPY என்றோ சில exotics என்றோ decimals வேறுபடும் — broker documentation-ஐப் பார்க்க வேண்டும்.

2. இண்டியா based trader-க்கு பிப் முக்கியமா?

மிகவும். குறிப்பாக USD/INR, EUR/INR போன்ற ஜோடிகளில் pip மாற்றம் நேரடி ரூபாய் மதிப்பை பாதிக்கிறது — அதனால் position sizing மற்றும் risk control இங்கே முக்கியம்.

SEO-friendly internal & external linking strategy

இந்த பதிவை உங்கள் வலைத்தளத்திலுள்ள தொடர்புடைய கட்டுரைகளுடன் இணைக்கவும் மற்றும் அதிகாரப்பூர்வ வெளியீடுகளுக்கு வெளிச்சம் விடவும்:

சுருக்கம் — முக்கிய takeaways

  • பிப் என்பது Forex-இல் விலையில் மிகச் சிறிய மாற்றம் — பெரும்பாலும் 0.0001 (அல்லது JPY க்கு 0.01).
  • பிப் மதிப்பு lot size, pair, மற்றும் account currency அடிப்படையில் மாறும்.
  • பிப்-ஐ புரிந்துகொள்வது risk management மற்றும் சரியான lot-sizing-க்கு முக்கியம்.
#Forex#Pip#USDINR#TradingTamil
rfxsignals October 7, 2025 No Comments

How to Set Stop Loss and Take Profit in MT4

How to Set Stop Loss and Take Profit in MT4

How to Set Stop Loss and Take Profit in MT4 — A Practical & Repeatable Method

Reading time: ~9–11 mins • Updated:

Correct stop loss (SL) and take profit (TP) placement turns a guess into a plan. In this guide you’ll learn how to calculate SL and TP using volatility, ATR, support & resistance, and risk-percentage rules — then how to place them in MetaTrader 4 (MT4) and use trailing stops, OCO logic and platform features to manage trades professionally.

Quick summary — what you’ll learn

  • Step-by-step MT4 placement of Stop Loss and Take Profit
  • How to calculate SL/TP with ATR, S/R, and % risk
  • Trailing stop methods, OCO setups, and broker considerations

Why SL and TP are not optional

Discipline is defined by rules. A stop loss limits downside and defines trade risk; a take profit defines reward and stops emotional greed. Without SL/TP you trade with an undefined loss potential and are more likely to make impulsive decisions.

How to decide SL — 4 practical methods

Choose a method that fits your strategy and time frame. Below are four widely used, tested approaches.

1) Risk-percentage (money management) method

Decide the % of your equity you will risk per trade (e.g., 0.5–1%). Convert that money risk into pips using position size calculator to get the SL distance. This method ensures consistency across trades.

2) ATR (Average True Range) volatility method

ATR measures recent volatility. A common rule: set SL at 1.0–1.5 × ATR(14) for your timeframe. ATR adapts to changing market conditions and prevents stops that are too tight in choppy markets.

3) Structure-based (Support/Resistance) method

Place SL beyond a clear structure (swing low/high or order block). For example, for a long trade place SL a few pips below the last swing low or the lower wick of a bullish rejection candle.

4) Time-based / session-aware method

During high-volatility events consider wider stops (using ATR) or avoid trades. For session-specific trading (e.g., London open), place stops based on recent session highs/lows.

How to calculate TP — common approaches

Take profit should be aligned with your SL so you maintain a favorable risk-to-reward (R:R). Common approaches:

  • Fixed R:R: 1:2 or 1:3 depending on your win-rate.
  • Structure targets: next S/R level, fibonacci extension, or pivot points.
  • Volatility target: set TP at a multiple of ATR (e.g., 2×ATR) when trading momentum.
  • Partial take & trail: take partial profits at first target and trail the rest with an ATR-based trailing stop.

Putting it together: example calculation (step-by-step)

Example: Account ₹100,000, risk 0.5% = ₹500. Trading EUR/USD, account currency in INR — calculate value per pip for chosen lot, then determine SL pips allowed by risk. Suppose 1 mini lot equals ₹70/pip; max SL = ₹500 / 70 ≈ 7 pips. Use ATR or structure to validate — if ATR(15min) = 12 pips, 7 pips is too tight → reduce size (smaller lot) or avoid the trade.

How to place SL & TP in MT4 (step-by-step)

Placing SL/TP when opening a new order

  1. Open MT4 → New Order (F9) or click the market watch pair then "New Order".
  2. In the order window set "Volume" (lot size).
  3. For Market Execution set Stop Loss and Take Profit fields before clicking "Buy" or "Sell". You can type absolute prices or pip offsets (on some brokers).
  4. Click "Buy" or "Sell" — SL & TP will be registered with the order on the server (check "Trade" tab for confirmation).

Adding or modifying SL/TP on an open position

  1. Open "Terminal" (Ctrl+T) → "Trade" tab → right-click on the trade → click "Modify or Delete Order".
  2. Enter new Stop Loss and/or Take Profit price levels (you can drag the order line on the chart if your broker supports chart editing).
  3. Click "Modify" to send the update to the broker. Verify the change on the "Trade" tab.

Using chart drag (quick method)

On many MT4 installs you can drag the SL/TP lines on the chart: left-click the order line, drag the stop or target to the desired price and release. Confirm by checking the Trade tab.

Trailing stops in MT4

MT4 has a built-in "Trailing Stop" function that runs on your terminal (not server-side) — it requires your MT4 to be running. To enable: right-click the trade in the "Terminal → Trade" tab → Trailing Stop → choose a distance. For server-side trailing stops or advanced rules use an Expert Advisor (EA).

OCO logic and advanced order management

MT4 does not natively support server-side OCO (One Cancels Other) for all brokers. Many traders use EAs or VPS-based scripts that place paired orders (stop-entry and limit-entry) and automatically cancel the other when one activates. If your strategy relies on OCO, test the EA thoroughly in a demo account.

Broker & platform considerations

  • Confirm minimum SL distance required by broker (some brokers enforce minimum pip distance from market price).
  • Check whether your broker stores SL/TP server-side — this protects you if your MT4 terminal disconnects.
  • Account currency matters for pip-value and position sizing calculations — use MT4 calculators or spreadsheet templates.

Practical tips & best practices

  • Always calculate position size after deciding SL — risk then size, never size then risk.
  • Avoid arbitrary round-number stops; base them on structure or volatility.
  • Use partial profits to lock gains and reduce psychological stress on large swings.
  • Journal every trade: entry, SL, TP, size, R:R, and outcome — iterate on rules.

Backtesting & demo testing

Before applying rules live, backtest SL/TP rules on historical data and forward-test in a demo account. Timeframes and pairs behave differently; what works for EUR/USD 15m may not suit USD/INR or exotics.

SEO-friendly internal & external linking strategy

To help SEO and user navigation, link this article to related pages on your site and cite authoritative external sources:

Final checklist — before you click BUY or SELL

  1. Have a clear SL based on ATR or structure and a TP that maintains desirable R:R.
  2. Calculate lot size from risk, not the other way around.
  3. Verify broker minimum SL distance and whether SL is server-side.
  4. Use partials or trailing stops to manage winners and protect profits.
#MT4#StopLoss#TakeProfit#Forex
rfxsignals October 7, 2025 No Comments

What Is Slippage and How to Avoid It

What Is Slippage and How to Avoid It

What Is Slippage and How to Avoid It — Practical Guide for Forex Traders

Reading time: ~8–10 mins • Updated:

Slippage is the difference between the expected price of a trade and the price at which it is actually executed. It is a hidden cost that eats into your returns if unchecked. This guide explains why slippage happens, how to measure it, real forex examples, and 12 practical ways to reduce or avoid slippage — especially useful for Indian traders and those trading INR pairs.

Chat on WhatsApp Join our Telegram
Want execution rules for your account?
View services

What is slippage? — the simple definition

Slippage occurs when the execution price differs from the price you saw or requested. If you place a buy order at 1.2000 and it fills at 1.2005, you experienced 0.5 pip (or 0.0005) of slippage. Slippage can be negative (you receive a worse price) or positive (you get a better price).

Why slippage happens — core causes

  • Market volatility: fast moves during news events or open/close sessions create large price swings and rapid quote changes.
  • Low liquidity: thin order books (e.g., exotic pairs or off-hours) mean large market orders move the price materially.
  • Order type: market orders execute immediately at available prices and are more prone to slippage than limit or stop-entry orders.
  • Broker execution model: some brokers aggregate liquidity poorly, have slow routing, or re-quote during high volatility.
  • Latency: delays between you clicking trade and the broker receiving it can cause the market to move.

Types of slippage — practical perspective

Consider two common scenarios:

1. Execution slippage (market fills)

Market orders fill at the best available price. If liquidity is thin beyond the best quote, the order "walks the book" and fills at worse successive prices.

2. Re-quote/failed fill slippage

Some brokers detect price movement and either re-quote for your approval or reject the trade, effectively causing opportunity cost or forcing a worse price.

How to measure slippage (simple metrics)

Two useful numbers to track:

  • Average slippage per trade: sum(all executed price - requested price) / number of trades.
  • Slippage as % of average spread: helps you see whether slippage is small relative to transaction cost.

Keep a spreadsheet tracking time, pair, order type, requested price, executed price, spread at execution, and remarks.

Real forex examples (illustrative)

- You place a market buy on EUR/USD at 1.0800; during a news spike the best available prices become 1.0802 and 1.0807, your order partially fills at those prices — slippage = up to 0.7 pip.
- You place a large market sell on USD/INR during thin India session and the order eats multiple liquidity layers — slippage can be several paisa per unit.

12 practical ways to avoid or reduce slippage

  1. Prefer limit orders for entry when possible. Limiting execution price prevents negative slippage (but may miss the trade).
  2. Use stop-entry orders rather than market orders for breakout trades. They convert to market only once price reaches your trigger but can still slip — combine with reasonable buffer.
  3. Avoid trading during major news unless you have a tested plan. Spikes widen spreads and increase slippage risk.
  4. Trade liquid pairs during main session overlaps. EUR/USD, GBP/USD and USD/JPY have deepest liquidity and lowest slippage.
  5. Reduce order size in thin markets. Break big trades into smaller child orders to avoid walking the book.
  6. Choose brokers with good execution and transparent slippage stats. Ask for execution reports and ECN/STP routing options.
  7. Use brokers with negative slippage policies or guaranteed stop loss if required. Note this may cost in commissions/premiums.
  8. Use proper position sizing and limit risk per trade. If a trade can gap, small size limits absolute loss from slippage.
  9. Pre-check average spread and liquidity at your intended trade time. If spread is wide, skip or reduce size.
  10. Automate execution where possible and reduce human latency. Algos or VPS near broker servers reduce delay.
  11. Test and measure slippage in a demo/live environment. Log fills and compare expected vs executed prices.
  12. Avoid exotic or illiquid crosses unless you understand their cost profile. INR exotics may carry bigger hidden execution costs.

Broker selection checklist (execution focused)

  • Ask for historical execution reports or slippage statistics.
  • Prefer regulated brokers with ECN/STP pools and competitive pricing.
  • Confirm order types supported (guaranteed SL, limit, stop-entry, OCO).
  • Check server/VPS proximity and average round-trip time if you scalp.

Technology & platform tips

For high-frequency or scalping strategies minimize latency: use a VPS, lower-latency internet, and a broker with fast routing. Avoid platforms that freeze or re-quote during high volatility.

Post-trade review — how to get better

Each week review your slippage log: which pairs, session times, order types and brokers produced worse fills? Use that data to adjust rules — maybe stop trading certain pairs in certain hours or switch to limit-only entries.

SEO-friendly internal & external linking strategy

Link this post to related site content and trustworthy external sources:

Final takeaway & quick execution checklist

  1. Prefer limit orders & trade liquid pairs during main sessions.
  2. Reduce size in thin markets and avoid headline spikes unless planned.
  3. Choose brokers with transparent execution and log fills to measure slippage.
#forex#slippage#execution#tradingtips
rfxsignals October 7, 2025 No Comments

Best Currency Pairs for Indian Traders

Best Currency Pairs for Indian Traders

Best Currency Pairs for Indian Traders — Which Pairs to Trade & Why

Beginner → Advanced Reading time: ~8–10 mins

Choosing the right currency pair matters more than you think. For Indian traders, considerations like liquidity, RBI interventions, spreads, trading hours, and availability from Indian brokers make some pairs far better choices than others. This guide explains the best pairs, their pros & cons, and practical rules for scalpers, swing traders and position traders.

Chat on WhatsApp Join our Telegram
Want tailored pair recommendations?
Contact us

Quick summary — best picks for Indian traders

  • USD/INR — best for hedging INR exposure, widely traded in India.
  • EUR/INR, GBP/INR — good for volatility and directional trades; watch spreads.
  • EUR/USD, GBP/USD, USD/JPY — global majors with low spreads and deep liquidity.
  • Crosses (EUR/GBP, AUD/JPY) — useful for diversification but can have wider spreads.

Why pair choice matters for Indian traders

Pair selection affects spreads, slippage, available leverage, and exposure to India-specific events (RBI policy, rupee volatility, import/export flows). Indian brokers often offer competitive pricing on INR pairs but margin rules differ so always check your broker’s contract specifications.

Top pairs explained (practical, by trader style)

1. USD/INR — The most obvious starting point

USD/INR is central for Indian traders who want to hedge rupee risk or trade macro moves (like RBI intervention, crude oil shocks, or large capital flows). Advantages: strong liquidity during Indian hours, many local brokers provide direct quotes, and news events in India directly affect it.

  • Who it's for: hedgers, intraday traders active during India session, macro traders.
  • Watch out: on days with RBI intervention, volatility can spike and spreads may widen.

2. EUR/INR & GBP/INR — higher volatility, higher opportunity

These INR crosses can offer larger trending moves than USD/INR but often come with wider spreads. They react to both domestic and European/UK news, so check session overlap and news calendars.

3. EUR/USD, GBP/USD, USD/JPY — global majors every Indian trader should know

Even if you primarily care about INR, majors are essential: low spreads, deep liquidity, and predictable behavior around US/European/Japanese sessions. They are excellent for technical traders and scalpers.

4. Cross pairs & exotics — use selectively

Crosses (EUR/GBP, AUD/JPY) and exotics (TRY/INR, ZAR/INR) can produce big moves but typically have bigger spreads and lower liquidity. Reserve these for experienced traders who account for overnight risks and slippage.

Key selection factors — checklist before you trade any pair

  • Liquidity & spreads: tighter spreads reduce cost. Majors are cheapest.
  • Trading hours: which session has the biggest move for the pair?
  • News sensitivity: RBI, FOMC, ECB, BoE—know the calendar.
  • Broker availability: check margin, min lot, and execution quality on INR pairs.
  • Correlation: many INR pairs correlate strongly with USD/INR—manage cross exposure.

Practical rules & strategies for each trader type

Scalpers

Favor highly liquid majors (EUR/USD, USD/JPY) and USD/INR during India session. Keep timeframes < 15min, use tight stops, low-latency brokers and small size to manage slippage.

Swing traders

EUR/INR and GBP/INR are attractive because swings are larger. Use daily/4H charts with ATR-based stops and be careful around central bank meetings.

Position traders / investors

Consider USD/INR for hedging or long-term directional trades. Build positions slowly and use macro fundamental analysis (trade balance, forex reserves, inflation).

SEO-friendly internal & external linking strategy (how to wire this post)

Internal linking helps search engines and keeps readers on-site. Example internal links you should add from your site:

Use descriptive anchor text (e.g., “RBI policy impact on USD/INR”) and add at least 2–3 internal links to related posts on your site. When linking out, pick high-authority pages to strengthen topical relevance.

Risk control & money management (non-negotiable)

Always define risk per trade (e.g., 0.5–2% of trading capital), set stop-loss levels based on volatility (use ATR), and avoid overleveraging—especially with INR pairs that may gap on local news.

Broker & execution checklist for INR traders

  • Does the broker provide direct USD/INR quotes or synthetic?
  • Are margin rules and overnight financing transparent?
  • How are spreads during Indian market hours vs. London/New York?
  • Is the broker regulated by a reputable authority?

Final takeaway & action plan

For most Indian traders: start with USD/INR and at least one global major like EUR/USD. Use EUR/INR or GBP/INR for larger directional trades if your broker offers reasonable spreads. Keep strict risk controls, wire internal links to help SEO, and update this post after major RBI or global central bank events.

#forex#USDINR#trading#indiatraders